I'll wager that it'll be pretty solid for our nerd cred to claim we've run a [bitcoin] miner in our day; who knows, they may even be worth something serious in the near future. I wouldn't call myself a Bitcoin advocate, but, do see some appeal in being part of something "cool" that might just pay off.
Part of paying off, is keeping the spend low. Raspberry Pis make a ton of sense as controllers when you consider electricity cost. Second, you'll probably be pairing it up with ASICs, so the Raspberry itself doesn't need much CPU. Lastly Raspberry Pis are cheap.
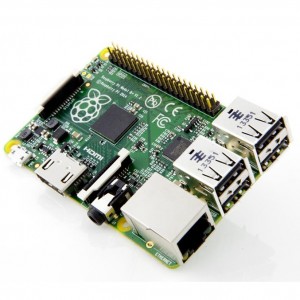
Raspberry Pi's B+ model works great as an ASIC controller
The Pi itself can't mine much coin though, its job is only that of muscling requests between your mint of choice and your ASICs (people did used to mine with GPUs, but with the processing that ASICs can now perform, I can't see GPU's being viable anymore). Some great entry-level ASICs are the Butterfly Jalapeño and the Rockminer R-BOX. Don't pay retail! Get them from folks on ebay who are selling them cheap because they couldn't figure it out!
Setting Up Your Raspberry Pi
For this first part, you won't even need the Raspberry itself. The RPi uses a micro SDHC card as hard drive, and the biggest part of the job is simply that of prepping it before you stick it into the RPi and boot.
- Download Raspbian from this link
- While that's downloading, nab SD Formatter from here
- Once downloaded, install - and then insert your SDHC card into your Mac
- Launch SD Formatter and execute a quick format on your SDHC card - quick should suffice
- Raspbian downloaded, unpack the zip so that the .img file is ready
- Fire up Terminal, and run diskutil list
- Note the SDHC card's IDENTIFIER in the output (mine was disk1s1)
- Unmount the SDHC card with diskutil unmount (drive). My command was diskutil unmount /dev/disk1s1
- Still in Terminal, in the folder where you unpacked the raspbian zip, execute the dd command with sudo, modifying the disk name a little bit: prefix it with 'r', and remove the subpart. For example, disk1s1 becomes rdisk1. As second example disk2s1 would become rdisk2. Adjusting the disk and img name to reflect your situation, command to run looks like: sudo dd bs=1M if=2014-09-09-wheezy-raspbian.img of=/dev/rdisk1
- Go make a sandwich, this takes awhile. You can hit CTRL+T to get a status update while dd runs.
- When this process is complete, put the SDHC card in your RPi, connect a keyboard and screen to it, and boot it up.
- Your first boot will take you through raspi-config. I recommend that you activate SSH so that you can park this near your miners, wire everything up (miners, plug into Ethernet, etc.) and finish from your couch over wifi.
Setting Up Bfgminer
I've tried a few, the Bitminter client, cgminer, and bfgminer. Bfgminer felt most solid; setting it up takes awhile on the RPi, but is well worthwhile
First, make sure that your RPi is all patched up with:
- sudo apt-get update
- sudo apt-get upgrade
Then, install the small libs we'll need with:
- sudo apt-get install libusb-1.0-0-dev libusb-1.0-0 libcurl4-openssl-dev libncurses5-dev libudev-dev build-essential debhelper autoconf automake libtool libssl-dev yasm pkg-config wget unzip libjansson-dev git quilt uthash-dev screen
You'll need to give bfgminer a home, I set mine up in /home/bitcoin. The commands to execute are:
- git clone git://github.com/luke-jr/bfgminer.git
- cd /bfgminer
- sudo ./autogen.sh
- CFLAGS="-O2 -Wall -march=native" sudo ./configure --enable-icarus --enable-bflsc
- sudo make
The sum of these commands will take awhile. The little RPi isn't the fastest compiler -- but the result is well worth it! You're nearly done! The --enable-icarus directive is what lets your bfgminer support Rockminers. Similarly, the --enable-bflsc lends Butterfly support to the build.
Once the compilation is complete, you can start your bfgminer with:
bfgminer /home/bitcoin/bfgminer -o pool -O user:password -S all
For example, I mine with bitminter - the launch command looks like:
bfgminer /home/bitcoin/bfgminer -o stratum+tcp://mint.bitminter.com:3333 -O Username_worker:password -S all
Remember to set up your worker ahead of time!
To run the command in screen, it'd look like:
sudo -u pi /usr/bin/screen -d -m -S bfgminer /home/bitcoin/bfgminer -o stratum+tcp://mint.bitminter.com:3333 -O Username_worker:password -S all &
By the way, the word password in the samples above, is really just 'password' if you are using bitminter where password isn't used.
This truly concludes things! You should be on the road to riches now! Let me know if this post helped!