
Safely Buying Bitcoin in Canada
Buying BTC as a Canadian can be tricky. You could throw caution to the wind and buy from an international exchange, but finding one that supports Canadian-bank issue cards is tough.
I was looking for a Canadian exchange regulated by FINTRAC that has to subscribe to PIPEDA. I've found only one! (If you know of another, leave a comment!)
Buy BTC with Coinberry
Buying BTC was pretty trivial.
Register for an account on coinberry.com
Once you are in, click on the Fund tab, and then e-Transfer
Pick your financial institution
Instructions will appear that look like so:
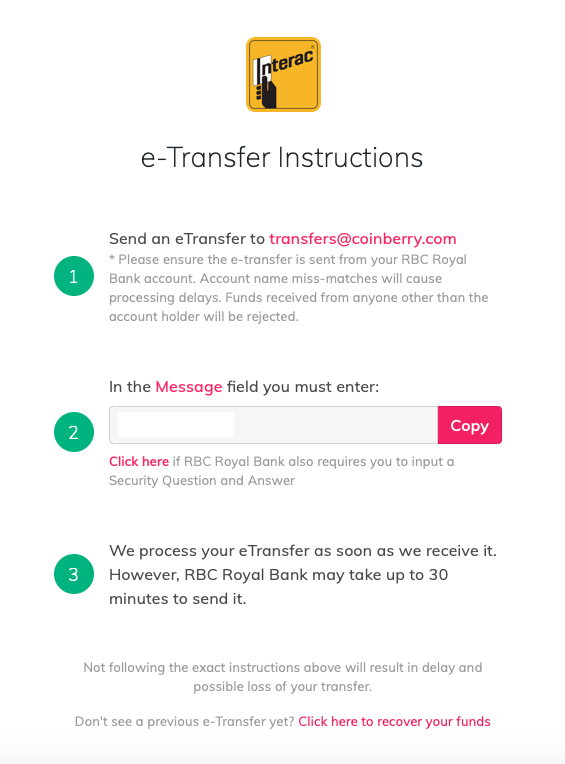
Follow the instructions - my funds were swiftly transferred and available within 4-5 minutes. Love it when it just works!
I downloaded their mobile app and used it to buy MAX BTC with the CAD I had transferred in.
Keep your BTC Safe
After you've bought your BTC - move the BTC to a secure hardware wallet. As promptly as you can, transfer your BTC from Coinberry over to a hardware wallet (such as the Ledger Nano S). Remember the motto: "Not your keys, not your coins!".
Good luck & Stay Safe!

Buying Bitcoin in 2020!
Buying Bitcoin as a Canadian can be a bit confusing. Here’s a helpful guide to getting some BTC.
Bitcoin's third halving on May 11 means that miners will reap fewer rewards with each block they solve. The pace of new BTC creation is cut in half, which happens about every four years.
This "halving" refers to an event in Bitcoin's code; it reduces the reward to control inflation.
Now, the coins in your wallet or exchange aren't affected by this. Their value in dollar terms won't change overnight; this simply affects the reward miners get when they discover new bitcoins.
What has been true, however, is that BTC has seen unprecedented gains in the twelve to fifteen months following previous halvings. Remember, you can own a "part" of a BTC; you don't need to buy a whole coin.
Ready to jump in? There's no time better than the present.
Your first step, register a Binance account here.
After you've registered, you'll have to verify your basic information at this Binance link. You can read more about Binance's privacy policy here. This is required of all reputable exchanges.
Once your verification is complete, you can buy BTC using your credit card at this link.
You’re Not Done Yet!
The next aspect of owning BTC is that of safeguarding it. Don’t leave your coins lying on exchanges. There’s the good old saying: “Not your keys, not your coins.” - the key speaks to the private key that is used to secure the wallet in which the coins are stored.
Buy a hardware wallet to which you can transfer your assets from Binance.
I’ve been using the Ledger Nano S for a few years, and it’s been a rock solid device.
If you buy a Nano S and need a hand, don’t hesitate to leave a comment below, I’ll gladly offer advice where I can!
Loading Doctrine data fixtures before each Behat scenario (Zend Framework 3/Laminas)
I had a case where I wanted to load Doctrine fixtures into my ZF3 MVC app, but at the Behat scenario level. Requirements were to reset to specific features (mixed and matched) before individual scenarios, right from within the scenario itself. What’s more, I wanted to use nelmio/alice — newly discovered — an excellent tool to define fixtures (it’s almost fun!).
Baked this, it works. Hope it helps!
Automatically Reload CSS with Zend Framework and Assetic
This article is targeted at Zend Framework programmers on OSX that use Assetic to compile their CSS/JS. With some interpretation, it might work for you if you don't fit into the above!
Hot reloading means reloading parts of a page without reloading the page itself. If you've worked on SPA apps in React or Angular, this is a must-have, but MVC stackers ignore you can have this cake and eat it too with the ZF3/Twig/Assetic combo on OSX.
Plus, it makes CSS work kind of fun (at most). I'd rather be doing other stuff too.
Your workflow becomes this:
- You modify your SCSS
- Something compiles your SCSS to CSS
- Assetic has to be triggered (typically triggered on page load, the usual)
- The CSS in the page has to reload dynamically
Step 1 is you, that part is clear. How do we get the rest working...
Prepros
Your first quest on this journey to reload-button independence is to run Prepros, which dually provides file compilation and a reload proxy.
- Fire up Prepros
- Add a new Project within Prepros, and set the base folder right at your module's assets folder (so, not your public folder -- the place where your SCSS initially compiles to CSS).
- Under Settings:
- enable the file watcher
- enable live preview, and use custom server
- set your server URL to be the domain that serves your stuff
- Under Live reload
- enable live reload
- enable animate css changes (this is the cool part)
- configure live reload delay. This one is a bit of a magic value that'll need some tuning. It's a function of your computer's speed. Essentially, this is the time that assetic needs to run. If you have a reasonably fast computer, you can set this to 2000. If you find that it stutters sometimes, you will need to increase its value.
- Under Composer Settings
- set your compiler to Node Sass. Zero chance that Ruby will be fast enough to please you.
If you make some SCSS changes now, you should see Prepros compile your CSS for you. You even get the fancy OSX notifications as confirmation that it's working. Point your browser to http://localhost:7880 (or whatever port you configured in Prepros), and you will see your site! The problem is that the CSS isn't changing; why?!
You got it.
There's no page reload, nothing invokes the Zend MVC stack, and Assetic is therefore asleep. Let's find another way to trigger Assetic.
Fswatch
Enter fswatch, https://github.com/emcrisostomo/fswatch, which can use the extremely efficient FSEvents on OSX to trigger filesystem events.
Install it with homebrew by issuing: brew install fswatch
Now, go into your Project's base folder, and create a new file called 'watchcss' with these contents:
fswatch -e ".*" -i "\\.css$" -0 . | xargs -0 -n 1 -I {} ./vendor/bin/assetic buildThe command is simple; exclude everything, yet include CSS, and run vendor/bin/assetic build when something changes.
Make watchcss executable, and run it ./watchcss
Now, fswatch will trigger assetic whenever Prepros compiles your CSS files. Then, Prepros will wait 2000 ms (adjust this as required) and thereafter hot reload your CSS!
Buying Bitcoin and IOTA in Canada
Not in the typical vein of this blog, but I thought my experience might help some. My want was very simple: buy BTC. Of course the crypto bug sets in and you'll want to buy more than just BTC (IOTA!).
CEX.IO?
My first foray into the fund-and-buy was admittedly with cex.io. They got good reviews, and they had a nice website; great UI design! It took a VERY long time to wade through the verification process, and I failed. I waited approximately 15 days to be told that my credit card couldn't be used with the account type that I had (claiming it was a business card, while this wasn't entirely true). The verification process is very black and white, and any failure imposes massive time penalties (they probably don't get to consider nuances with the volume of applicants they probably receive). The minimum withdrawal values were a pain (I never did get verified). I found myself having to transfer BTC (which carries a fee) into cex.io just to surpass the min transfer threshold so I could get leftover BTC out. I can't recommend this exchange. Verification is a hassle, and the fees are very real. Great study on modern UI design though!
GEMINI?
After this I had tried to register with Gemini. I did get an initial onboarding response within about 2 weeks, replied with all required documentation, and still haven't heard from them (it's been quite some time!). Might pan out one day, who knows...
BITFINEX?
Bitfinex was the next find. I registered and headed to the verification area. The documentation requirements were very thorough, and direct deposit was not working at the time at which I wanted in. Before handing over the critical personal information; I thought I'd do a bit more Googling about Bitfinex... The writing on the web has that Bitfinex has been hacked twice already. I chose to stay away, too much negative on the web for my personal taste.
QUADRIGA!
Now the good: quadrigacx.com! What a change in pace (and breath of fresh air!). Their site isn't as pretty as cex.io's; much more utilitarian -- but it works. I registered and submitted the verification documentation on the same evening; and was validated about 2 days later. Back in, went through the Equifax verification, and was off to the races!! Exciting!
On a 2k deposit, you end up with $1,970 usable funds (transaction fee). Plus, funding from major Canadian banks is near immediate with direct transfer! I wish I had found these guys first!
So.. BUYING IOTA
Last bit before I wrap this up then! If you are registered on quadrigacx.com and would like to buy IOTA (really promising idea with unique propositions); I managed to do this successfully yesterday.
- First, register an account at binance.com.
- Purchase BTC on Quadriga, meaning: fund your account with CAD, then buy BTC from the Dashboard or Trade tab.
- Log into binance.com, and access the Funds and Withdrawals area.
- Locate the BTC (Important!! Screw this up and you lose your BTC) row, and click on Deposit.
- Copy your BTC deposit address very carefully (it has happened, that this address takes a few seconds to appear).
- Head back to Quadriga, and click on "Withdraw" to send your Quadriga-bought BTC over to Binance. On the withdraw panel, specify desired BTC amount, and paste the Binance fund address into the Quadriga withdrawal form.
- Wait for the transaction confirmation to occur (on average, has taken me 20 minutes or so).
When the transaction verifies (be patient, the BTC transaction can take some time to verify), simply trade your BTC for IOTA in your Binance trade panel (under Exchange/Basic):
- Top right, select BTC and search for iota (image below)
- Click the IOTA/BTC row in the search results
- The center area will yield the section where you can transform your BTC into IOTA
- For a fast buy, click the Market tab; click the 100% button in the Buy IOTA panel, and then click Buy IOTA
- Done!

When I buy BTC, I quickly send it to my Ledger Nano S (recommended!) to mitigate any loss if the exchanges are breached. There's unfortunately no support for IOTA right now -- so consider your cold storage options carefully. Drop me a comment if you've solved this bit!
Don't forget to secure your Binance and quadrigacx.com accounts with Google Authenticator!
Good luck!
Gemini, © Copyright 2017 Gemini Trust Company, LLC.
CEX.IO, © Copyright 2017 CEX.IO LTD.
Bitfinex, © Copyright 2013-2017 iFinex Inc. All rights reserved.
QuadrigaCX, © Copyright 2017 QuadrigaCX. All rights reserved.