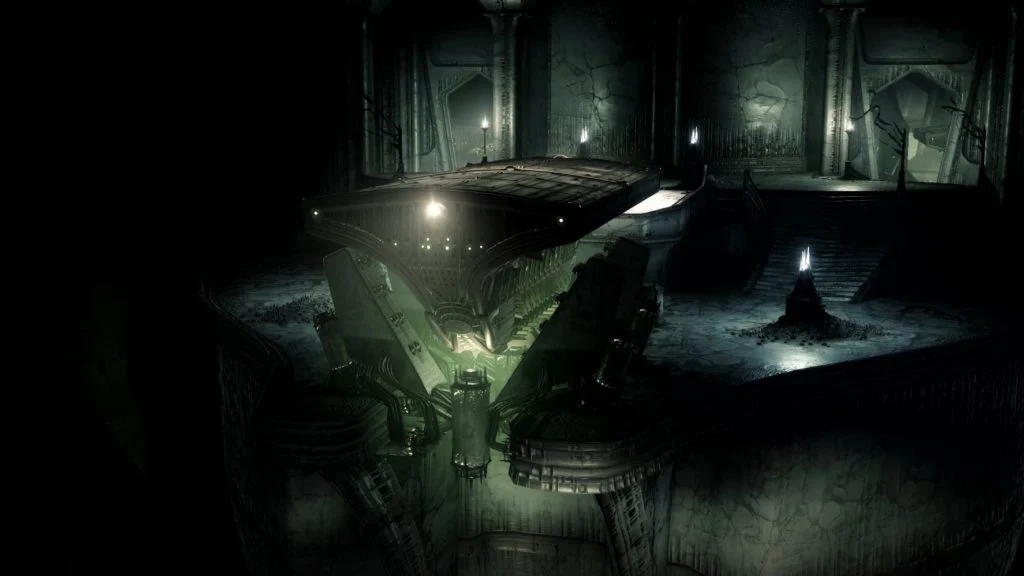
Step One - Statue Rooms
Map of first room and potential relic encounters courtesy of u/FluxDipole
We have to activate statues to open the portal to get in.
Roles
1 Middle team (2 guardians)
2 Relic teams (2 guardians per team)
SETUP
Middle Team: One pair in the middle to kill combatants and pitch in on doors.
Relic Teams: One relic team on left, and one on right. In each team there's a relic carrier, the other defends.
Carriers coordinate together (3, 2, 1, pick up) and run back to center room to dunk.
Defenders keep the paths clear and shoot barriers down.
Comms clear, so that relic holders can coordinate dunking on designated statues at “fairly the same time”.
Tips
The relics spawn deeper and deeper into the area which makes the journey slightly longer after each dunk.
Keep those bridge areas clear, easy to get phalanxed
Wait! Don’t run into the portal right when you are done. Instead, inspect the area beneath the portal to see what symbols trigger the extra red-border weapon at the end.
Step Two - Lantern Hopping and Hive Ships
Ship jumping pattern:
Ship-jumping sequence, click to view full size.
Roles
Team of 4
Team of 2
SETUP
Ships traveling throughout the area.
Get through the lanterns and ship jumping puzzle to reach the ship area with the green barrier.
PROCESS
Split up into a group of 4 and a group of 2
2-group stand on the initial platforms. This disables the green barrier, but also opens a secret door.
The other four stand on the ship, but before they cross the barrier, they long jump to the left to reach a staircase.
At the top of the staircase, is a door that the two portal-players are keeping open.
Once the 4 open the chest, they jump down and open the portals (same way)
Now the original 2 get on the ship, get to the chest the same way (long jumping to the left)
Regroup and continue.
We go up a lift, and now it's the first real fight.
Step Three - BASILICA (TOTEMS)
Roles
Two teams of three (there’s an alternate setup where you can do three teams of two - but it costs seconds on each rotation).
SETUP
Unstoppable mods are required for this encounter.
There's a plate in the middle, and a locked door with runes running up its sides.
To the left and right are rooms, these have totems of annihilation.
There should always be at least one person on each totem (2 players total) - this is a wipe mechanic that is easy to avoid.
The challenge, is the totem rooms are poison - they'll keep damaging you while you are in them.
The solution, is an orb that you grab before you run in. It creates a shield that protects you (Brand of the Weaver) from the room’s poison. Careful, if this buff runs out, you die.
While you have Brand of the Weaver, kills stack Deathsinger’s Power, a buff that lets you decrypt the door.
You redeem Deathsinger’s Power by standing on the center plate, and this unlocks the large door before it (the runes on the sides light up).
PROCESS
Each team of three has to set up a rotation:
You can see the doors that spawn Wizards in this image (upper left and right dais).
At the start, one player swiftly runs to the totem grabbing the orb on the way.
The second and third members are still in the middle, clearing ads.
The player in the totem room must get kills to stack Deathsinger’s Power (this is the true root objective). Careful of the boomer knights that spawn up top, prioritize killing these.
The two players that remain in the middle rapidly kill the Wizard that spawns on their side’s upper dais, to then clear the Blight Guard Knight that follows the Wizard’s death. When the latter dies, he leaves a taken sphere that buffs with Brand Claimer.
One of the two players grabs this buff, and immediately runs down to steal the shield from the player that’s on the totem. This is an active button you have to press to interact & steal. This action trades Brand Claimer to yield Brand of the Weaver. You’re now on deck to kill adds and stack Deathsinger’s Power within the orb’s safety.
As the initial totem-minder whose buff was just stolen, run to the middle to stand on the center plate with all of your Deathsinger’s Power stacks. Brag about your big stack count while you realize that you are now a middle player for your team, and must kill the Wizard and Blight Guard with your friend.
One of you grabs the buff, and the cycle continues. Rinse and repeat until the door is fully decrypted.
Unstoppable ogres will spawn in the center at certain rune-progress points. Kill these fast, which won’t be a problem since you had the mod equipped!
TIPS
COMMS CLEAR for switching - only thing we should hear is individual teams coordinating the switching.
Make sure that you drain your stacks completely on the center plate before moving on. If you have Deathsinger’s Power, then you can’t grab the Brand Claimer.
If someone dies, recovery is possible - just have to make sure that there's always someone on the totem EVEN if they are dying to poison since they have to stand on the totem without an orb. Eventually the orbs respawn.
Throughout the process, as a middle-room player, you probably want to let red-bar adds trickle through and down the ramp so that the Weaver can get more stacks of Deathsinger. You might want to, however, try to beat up the tougher ones as much as possible without killing them (knights, notably).
Healing grenades, Phoenix dive and wells aplenty.
Maxing out resilience is vital.
Thermoshock plating is helpful.
Osteo Striga is provably a top choice for this encounter.
Everyone should have the season’s unstoppable weapon & mod equipped. At the time of writing, this was pulse rifles, and unstoppable pulse rifle.
Don’t stun the Ogre until his animation is done, it otherwise wastes the unstoppable shot. Let it emerge fully.
Door opens, profit.
STEP FOUR - WAR PRIEST
Roles
Three teams of two, but several sub-roles.
One member of the center team will start the spotting process. Designate them.
Two members will be “Knight One, and Knight Two” respectively. These are the players that “peel away” to go kill a knight.
Optimal: Left and Right hand teams should each have a member with Aeon’s to generate purple bricks by finishing the Wizards and the Knights.
Ultra-Optimal: One of these Aeon users should run Divinity
SETUP
There are three plate-and-pillar combos in the room (left, middle, right).
Two players on each plate to start the encounter - step off the plate after.
PROCESS
Kill adds until Blistered Wizards spawn, kill them.
When the Blistered Wizards are down, Revenant Knights will spawn. Kill those.
A message appears telling you it's puzzle time: Glyph reading sequence started.
GLYPH PUZZLE PHASE (3-player exercise)
The middle Spotter standing on their plate, can examine the backs of Left and Right pillars to see if they are illuminated*
If either of them is lit, memorize which (Left or Right).
If none are visibly lit, then you know that the puzzle starts with middle (since that’s the one whose back you can’t see).
With the starting plate silently identified (right, middle or left) step off your middle plate.
A new message appears, Glyph sequence started.
If you identified middle, just step on it, and then call out the next plate, which would be “Left” or “Right”. If it wasn’t yours, call out the side that you spotted.
A player from the team whose plate was identified stands on their plate. Then, from their vantage point, they examine the other pillars to see which one is lit, and call it out.
Three players make their way onto their plates in this manner, spotting for one another.
*On phases 2 & 3 where pillars have been destroyed, what used to be an illuminated back, becomes a glowing red effect. Can’t miss it.
As example scenario, imagine that I am the middle plate spotter. I first stand on the middle plate, and check left and right. I see nothing, so I know that it’s middle that’s illuminated. I get off my plate, and then get back on to activate my pillar. Then I check left and right, and notice that left is lit. I say “Left” and Left stands on their plate - and there’s but one option left. Left confirms they are on their plate, and says “Right” to signal their plate is lit, so right stands on theirs. DPS starts.
When all three plates are done the one guardian will get a red aura triggered by a timed buff called Brand of the Initiate. All guardians must be within this aura to damage the boss.
Everyone gets into damage position, except for Knight One
On first damage phase, we set up on the bottom right and hide beneath the right pillar when necessary.
On second damage phase, set up on bottom right again, yet hide beneath the middle pillar.
On third damage phase, set up on top left platform, and hide beneath the left pillar.
Everyone joins inside the bubble.
DPS.
Now the tricky part, pay attention.
When Brand of the Initiate is obtained, a Blight Guard spawns again. As with the previous encounter, this will drop a Brand Claimer buff.
While the fire team is damaging the boss, Knight One must separate from the team to: find this knight, kill it, grab Brand Claimer, and run to the aura.
They must share that they have killed their knight right away, “Knight down - Knight Two Go”, which signals for Knight Two to leave the bubble right away to find another Blight Guard that now spawns.
Meanwhile, the person with Brand of the Initiate must count their buff down at 10, 9, 8, 7, 6, 5, 4, 3, 2…
The guardian with Brand Claimer then steals the buff (interaction, it is not automatic), to prolong the DPS phase.
You can get a total of 3x damage “rounds” within a phase this way.
You run out of time, and the interstitial phase begins.
A note on Blight Guard knight positions
The Blight Guard knights never spawn in the section where the buff was obtained. This narrows your search space to the other two locations.
OCULUS INTERSTITIAL
After damage, the OCULUS appears. The OCULUS casts a “light spell” that decimates anyone that isn't in a pillar's shadow and blows up that pillar. Hide behind the pillar where you were damaging the boss.
The light spell will nuke one pillar.
After the pillar is broken, we rinse and repeat, retaking our original positions in teams of 2 at our pillars.
On the next pass, we don't meet at the middle (the pillar is gone!), we meet at a position whose pillar is not destroyed.
Consider starting DPS first at top left, then at middle, then going to right (and then technically, one last-chance phase top right again).
Strategies where the aura is “moved” should be avoided. These cause more harm than good.
TIPS
Taipan 4FR with Triple Tap and Firing Line (+Veist) is a great choice. Snipers are also excellent.
Divinity is recommended.
It is recommended that at least one member of the left and right teams runs Aeon’s to get extra heavy drops from finishing yellow combatants.
Everyone should keep their eyes peeled when DPS starts, to help Knight One find their Knight. Call it out clearly, e.g. “Knight Right” (and not for example, “Knight is here!!!”).
Timesaver! During the DPS phase, the Blight Guard Knights will never spawn in the same location as the last plate.
Step Five - Maze (Cellar)
There’s a chest in here.
Cellar chest order.
Five plates.
Unlike D1 which required cracking the combination, in D2, you stand on them in a fixed order (easy)
Chest opens after you step on each of the plates in the correct sequence (chest is in the middle area).
Plate 4 is high up, through a hole in the wall.
Plate 5 is over some debris.
Step Six - Golgoroth
ROLES
2 Gaze Grabbers
DPS team
SETUP
The encounter starts by shooting a water bubble on the ceiling. This spawns Golgoroth.
Golgoroth has a crit-spot on his back/shoulders - this makes him gaze at the person that damages it.
Goal is to prep damage phases by clearing adds, and then to manage gaze to orient Golgoroth toward buff pools (and keep his damage spots open).
These buff pools are created by dropping yet more bubbles from the ceiling, one by one.
Careful: During the DPS phase, don’t use Rockets. We are too close together. LFR and Sniper are recommended.
Gaze Grabbers might want to equip Arbalest to easily grab gaze, Calus Mini Tool to quickly deal with adds, and a Machine Gun to deal with Axion Bolts.
DPS team consider using Osteo Striga or Calus Mini Tool for adds, and a Linear Fusion Rifle for damage.
PROCESS
Start the encounter, this starts the ADD PHASE.
ADD PHASE
Kill all the adds.
Once they are cleared, it’s time to setup for the damage phase.
Keep an eye on Golgoroth in the process, when you are ready for DAMAGE, you will see a new droplet appear and will also see Golgoroth’s back-area crit spot.
GAZE GRABBING TEAM + DPS TEAM
After add clear, Gaze Grabbers move to the right of the map and stay out of Golgoroth’s LOS (hide behind a pillar).
Gaze 1 says “Grabbing”, and waits for DPS team to say “ready” (they are usually scattered around the map, and need to regroup).
DPS team regroups at the pit’s mouth, and says “ready”.
Gaze 1 shoots Golgoroth in the back to grab its gaze, and rotates to behind the DPS team so that the belly faces the team.
Gaze 1 stays away from the pool and kills the Axion darts that are traveling toward them (Golgoroth will target gaze grabbers at this point, not the team).
Your job is to simultaneously keep Golgoroth aligned with the team.
Gaze grabber 2 ensures at this point that they can see Golgoroth’s back at all times, get ready for Gaze 1 to countdown so that you can then grab gaze.
DPS Team, after you hear Grabbing, fire on the ceiling-orb to drop damage-buff pool. Once dropped, step into the pool and get ready to shoot.
CAREFUL. One person in the team will get Unstable Light. This person must run right up to Golgoroth to deal damage (when the debuff timer expires). They can then rejoin the team.
DPS Team Only, damage Golgoroth by shooting the white spot on his belly.
DPS Team Only, when your damage buff is nearly run out, quickly shoot down another droplet to extend your damage phase.
As gaze is running out, Gaze Grabber 2 gets ready to grab gaze and rotate. Gaze 1 will call “Gaze over in 3, 2…” And then then Gaze 2 grabs gaze and rotates behind the team. Gaze 1 returns to the back area and prepares to rotate again. Gaze Grabbers, keep repeating this process.
After 6 droplets, a message appears that Golgoroth is tired. The phase concludes, everyone must get out of the ‘pit’ area.
Repeat.
Tips
Golgoroth’s stomach is only ‘open’ if someone has its gaze.
Invis ruins gaze, gaze team should never use invisible.
During the damage phase, one person in the buff pool will get an Unstable Light debuff. This person will explode others, and should run to Golgoroth to pepper him with a bit of damage. Note, the person with this debuff survives, so if everyone dies but them you’ll know exactly who it was! Tell the children, they will point fingers, and they will laugh!
Droplets are pretty robust, be sure to team shoot together.
There’s a totem in the back that contains 6 runes. When this totem fills, it’s a wipe. The runes light up based on the number of droplets that were still intact on the ceiling when your damage phase concluded. Thus, if you find that your phase is about to conclude (gaze lost, etc.) - break remaining droplets before the phase is over to avoid this totem-filling mechanic.
Lunafaction Boots are reported to be helpful here.
Step Seven - The Wall of DI**S
Not much to write for this one:
Don't get hit.
There are plates that build pathways.
You need to use these pathways and plates in a coordinated fashion to get to the end.
Once you get to the third, the pathways stabilize.
There are two red-border chest runes in this area.
SECRET CHEST
There’s also a mechanic from D1’s the Taken King - your Ghost can reveal invisible things.
At the first plate, check the pillar in the middle with the small walk-spaces. Jump to it.
Open your ghost, you will see invisible bridges
These bridges take you to a large pillar
Climbing the pillar (and I think more bridges) gets you to a room that had a chest
STEP EIGHT - DEATHSINGERS
This phase is a simple puzzle that requires setting up a jumping puzzle between two plates, and having a third player complete the jumping puzzle itself.
ROLES
4 Plate People
2 Free Agents (that will substitute Plate People as required)
SETUP
Room is divided into quadrants, each quadrant has a plate.
Note the Deathsingers on 2 elevated platforms that are shielded, these are the kill targets.
Shoot your guns to start the encounter.
PROCESS
OBJECTIVE-IDENTIFICATION PHASE
One of the plates will have a Hive Knight on it, this is the Starting Plate.
Guardian assigned to their plate says “<plate name> Start!" (e.g., “L2 Start!”)
The guardian assigned to the plate with the knight jumps onto their plate (and stays there) and kills their knight.
After this guardian kills their knight, they stand in the center (glowing green), and will see an objective above another plate. They are the only one who can see this, and they call it out clearly, e.g. “R2 finish!”
The guardian assigned to the objective plate jumps onto their plate (and stays there), which are now both glowing green.
CONNECTION PHASE
One of the team members will have become torn (invisible). They are the “connector”. As a side note, this torn-connector must interact with the team to request a substitute if they were assigned to a plate. If they were a floater, all is well. Otherwise, they just say "<position> Torn!” and a Free Agent takes their position.
The torn guardian must travel on the floating platforms, from the starting plate to the finish plate.
One the first and second connections, the end of that jumping puzzle has a relic that they must simply touch to conclude the phase.
When they either touch the piece, or grab the relic - they call out “Got it, off plates” - and everyone jumps off to identify the next starting plate.
BRAND CLAIMER PHASE (3rd connection phase)
On the third “connector” phase, rather than just touching the relic, you have to pick it up (interaction).
This gives you a Brand Claimer buff that you use to steal the shield of the Deathsinger THAT IS SHOOTING AT YOU (not the other one!!).
Be patient, get a clear view of the one that’s shooting at you!
Jump down toward that shooting death singer (atop its platform) and interact (Square on PS5) to remove its shield (it will do a Slam animation).
Rejoin your group on the small step that’s opposite the one that just got slammed.
Now it’s DPS time.
DAMAGE PHASE
Even before the slam occurs, everyone collects on the small step that’s down and opposite the Deathsinger that is shooting magic.
Damage the Deathsinger whose shield was removed.
Make sure you pause and stay in the immunity shield when the phase ends (instant death otherwise).
Repeat the entire process. Read tips before you proceed.
TIPS
If you one-phase the first daughter, you must one-phase the second daughter. Gauge your team’s power very carefully, back off if you have to.
Gjallarhorn and Hotheads everyone!
If you are torn, use position and torn in your callout very clearly! “L2 Torn”. Don’t stay stuff like “I’m torn” or “BBQChicken Torn”. Position is vital.
Floaters if you hear a torn call out, acknowledge it audibly! “Subbing L2”

Callout positions
Step Nine - ORYX
There’s a lot going on here. Read the whole thing a few times. The first part of this, is very similar to the Deathsingers above.
Roles
2 Free Agents
4 Plate People
Setup
Same as the last room, four pedestals in four quadrants.
Similar “invisible plate with orb mechanic”.
Two random revenge mechanisms.
Divinity recommended.
LFRs recommended.
Osteo Striga or an SMG with incandescent is stellar for add clear.
Process
CONNECTOR PHASE
Assigned plate people go to their plate (not on it, beside it) - the jumping puzzle is still there.
At first, Oryx will slam a plate (long animation). The plate he slams, is where the puzzle starts as his plate turns green. Don’t jump on it too early, wait for the green.
On subsequent connector phases, the plate will not get slammed, it simply turns green.
The Plate Person whose plate has turned green, jumps onto their plate, says “<position> Start” and scans for where the objective now lies and calls that out too, “R2 Finish, R2 Finish”
The objective is a little diamond-shaped icon high above one of the other 3 platforms, with a Toland-looking relic near it.
It’s the same as the Deathsinger phase; a random team member will become torn, and must connect the objectives.
Torn members may need substitution.
The torn person travels between the two discerned quadrants to collect a piece of the Blight Guard.
Repeat this until you reach the third connection phase, instructions below.
PREPPING BOMBS
During the first connection phase, you will see Ogres spawn in each quadrant. They must be quickly killed by plate guardians, and free agents. Try to kill them in position so that their relics drop in tidy positions.
Don’t touch these bombs. It will wipe the team if you do it now.
After you kill your Ogres, Light Eater Knights will spawn in each quadrant as well. They are trying to get to the relic that’s diametrically opposed from their spawn point. You must kill this knight to prevent its attempt to eat its bomb (you want those relic bombs intact).
In other words, kill your Ogres, and then rapidly kill your knights!
After this is done, go near your bomb, but outside its black circular aura. Look at the floor, not only at the sphere.
Repeat until the 3rd connector phase concludes.
AFTER THREE CONNECTORS, THINGS ARE A BIT DIFFERENT
The last torn-individual’s platform object will be a collectible Brand Claimer.
Torn guardian collects it, and heads to the Vessel of Oryx in the middle of the map and interacts to steal his shield.
The team then quickly melts the Vessel of Oryx (whose invincibility has just been removed) before Oryx does his slam animation.
While the guardian is in the middle of the map,
By this point, other members are NEXT to their bombs, but not within their black aura!
Text appears in the corner “Oryx calls upon the Darkness”.
Someone calls 3-2-1-GO.
As a plate person, when you hear Go, step onto your bomb and stay there until you see “<Your Name> has detonated a Corrupted Light”!
PREP FOR DAMAGE!
Fact: Guardian with the shield is still in the middle.
Fact: Plate people, with substitution, are on their bombs
Fact: Someone called “3-2-1-Go” and assigned plate people stepped onto their orb (within their quadrant).
Fact: All bombs have been detonated
Run to middle within the shield, fast!
Oryx slams, you survive because you were in the shield.
DPS - stay in the bubble!
The damage phase concludes, the aura has saved you.
Quickly! Plate people return to YOUR PLATES, and free agents go to the center of your sections.
One of two special revenge scenarios occur…
METEOR SCENARIO
If you see knights spawning on plates after this - it’s meteor time.
Start running in circles around your assigned plate or center section (free agents) to avoid explosions. Don’t stop moving.
If you screwed up and are at someone else’s plate, get outta there and go to yours.
Killing knights ends this phase faster, but is not required.
When the meteors conclude, restart by identifying the newly green plate, and beginning anew.
TELEPORT SCENARIO
Oryx goes back to the middle and makes a black ball and teleports us one by one into a misty circle area.
All members should head to the L2/R2 section to kill thralls that are trying to run into the circle.
If you are teleported, kill the Shade of Oryx as fast as possible (unload everything you’ve got, minus perhaps DPS ammo). Don't get hit by its sword. The Shade will phase in and out of the middle area. If you don’t kill him, it’s a wipe.
I find that listening for it is an easy way to get oriented.
Once the shade dies, everyone is back in the encounter room, and the mechanisms restart.
Pro Tip: During Sphere phase, if someone dies, THREE people go for revive and mash their revive button simultaneously. If you send just one, they could get teleported, and this makes it difficult.
FINAL STAND
If you get here, you have to kill Oryx. Make sure your ammo is in good shape before committing to final stand. If you’re low as a group, try to avoid getting to final stand until you can amass some ammo.
Oryx is going to appear in front-middle.
L2/R2 assigned plate people next to your Ogre spawns, fast.
Two ogres will spawn in the front (near L2 and R2), you have to melt them as fast as you can as a team.
The two people who are near blights jump into them, detonate them, and run to middle.
All out DPS on Oryx, it’s do or die. Good luck!
TIPS
Torn guardians, cannot detonate a bomb. If a torn person is chosen as 3rd connector, the free agent in their section has to assume their responsibilities.
Witherhoard has been reported to work well against Oryx.
LFRs with triple tap and firing line are excellent as a team strategy.
Congratulations on making it this far and completing the raid!
Appendix: Red Border Chest


Red Border Glyph Locations, image provided by u/Zhentarym and u/LegionnaireFrog
Interested in joining Pyre? Visit us at our D2 Clan Site, and Discord.